

HANUMANASANA
Hanuman* is the name of a monkey-chief, leader of a large troop of monkey-like creatures. His adventures are recounted in detail in one of the two great Indian epics, the Ramayana (pronounced rah-MY-uh-nuh, the other being the Mahabharata), in which he’s an ally of the hero Rama in his war against the demon-king of Lanka, Ravana. The shape of the pose is said to emulate the gigantic leap taken by Hanuman from India to the island of Sri Lanka, where he went to search for Rama’s wife Sita, kidnapped by Ravana.
His name means “heavy” or “large jaw.” Legend has it that as a baby, he tried to rise up and grab the Sun, which he mistook for a fruit. To prevent this Indra, king of the gods, whacked him on the jaw (hanu) with a thunderbolt, hence the name.
Hanumanasana isn’t a traditional pose. If it looks familiar, that’s because it’s based on what gymnasts call “the splits.” Generally pictures of it show the performer with the back of the front leg and the front of the back leg fully on the floor, which is quite challenging (and possibly injurious if performed improperly or without adequate preparation) for the average student. Fortunately, there are ways to perform the pose after an adequate preparation and using props that make it reasonably accessible to most students.
Here are two basic exercises to help prepare the backs of the legs for the pose.
1. There are many ways to stretch out the back of the legs, I prefer a kind of modified reclining big toe pose (supta padangushthasana). Make your strap into a large loop, slip it over your torso and snug it into your back armpits. Lie on your back, knees bent, feet on the floor, and with an exhale bring your right thigh into your torso. Hold the shin and press the thigh against your belly, release your lower back to the floor.
2. Slip the loop over the right sole, inhale, and press up through the heel, stop with the knee slightly bent. Snug the belt and clasp your hands on the back of the thigh, just above the sit bone. With your hands, resist the thigh toward the torso, and with an inhale, press your thigh against the resistance of your hands and carefully straighten your knee. Be sure you draw the knee cap toward the hip by contracting the quadriceps, don’t push it into the knee joint. Every time you want to stretch the back thigh a bit more, bend the knee, snug the belt, resist the hands and with an inhale, push into the hands. The head of the thigh bone ideally does (or feels like it does) two things: it sinks deeper into the hip socket (toward the floor), and moves away from the pelvis, deepening the front groin. Essentially you want to straighten the knee by moving its two ends, the femur head and the heel, farther apart.
3. You can keep the left knee bent or straighten the leg. Inhale and push out through the left heel, hold the heel slightly off the floor, turn the thigh inward (so the left toes point slightly right), and press the leg down against the floor. Continue to press actively through the back of the left heel and the base of the big tow. Hold the pose anywhere from 2-3 minutes. Then bend the right knee slightly, remove the right foot from and slip the left foot into the loop and repeat the instructions on the left side.
4. Next stand and go to a wall. Wedge the sides of a block (the middle width) between the topmost back thighs and the wall. The block must be placed precisely at the very top back thighs if this exercise is to be effective. Step your feet away from the wall 8-10 inches so that you’re slightly leaning against the block. Exhale and bend forward into standing forward bend (uttanasana), if the block slips down slightly (or falls), return it to the topmost thighs. Make sure you’re pressing the the top thighs into the block, not simply locking the knees. You can burrow your thumbs into the front hip creases and push back on the femur heads. Every now and then, lift your torso slightly with an inhale, lengthen the front torso, especially between the pubis and navel, and lower back to the full forward bend. Stay 2-3 minutes, then lift up on an inhale with a long front torso.
5. It’s quite possible you’ll need a bit more stretching. You can do Triangle Pose (trikonasana), Intense Side Pose (parshvottanasana), Standing One Leg Raised Pose (urdhva prasarita eka padasana), Wide Leg Standing Forward Bend (prasarita padottanasana), and any of the sitting forward bends you favor.
Now for the front groins.
6. Take a lunge, right foot forward, knee fixed directly over the heel, left knee on the floor (padded with a blanket), stretched back as far as you like. Keep your torso upright, hands resting on the right thigh. You might want to straighten the right knee slightly, press your right thumb into the hip crease, releasing the outer hip downward, the re-bend the right knee, keep the groin deep.
7. It’s essential, not only for the pose but your own safety, to draw up on the pubic bone and lengthen the tail bone downward. As you slide the left knee back, you’ll feel a tug on your front thigh and groin. The front pelvis may be drawn down, which will compress the lower back. If you feel that happening, back off the lunge, lift the pubis strongly toward the navel, then re-bend keeping the low back long. Stay for 2-3 minutes, if you want a little more, draw the left heel toward the buttock, take hold of the left ankle and pull the heel even closer. Hold 30 seconds to a minute.
8. Release, press your hands to the floor, right arm outside the leg, and lay the weight of your torso on the right thigh. Inhale, and as you continue to drop the right thigh floor-ward under the torso’s weight, straighten the back knee. Inhale again and straighten the right knee just slightly. Reach the left heel toward the floor, hold the thigh away from the floor, and re-bend the right knee. As you continue to reach through the left heel, lift through the top sternum in the opposite direction. Hold for a minute, then bend the back knee to the floor, and reverse.
9. If you need to stretch more in the front thighs and groins. You can try Side Angle Stretch (parshvakonasana) and virabhadrasana 1.
Now at last the final pose.
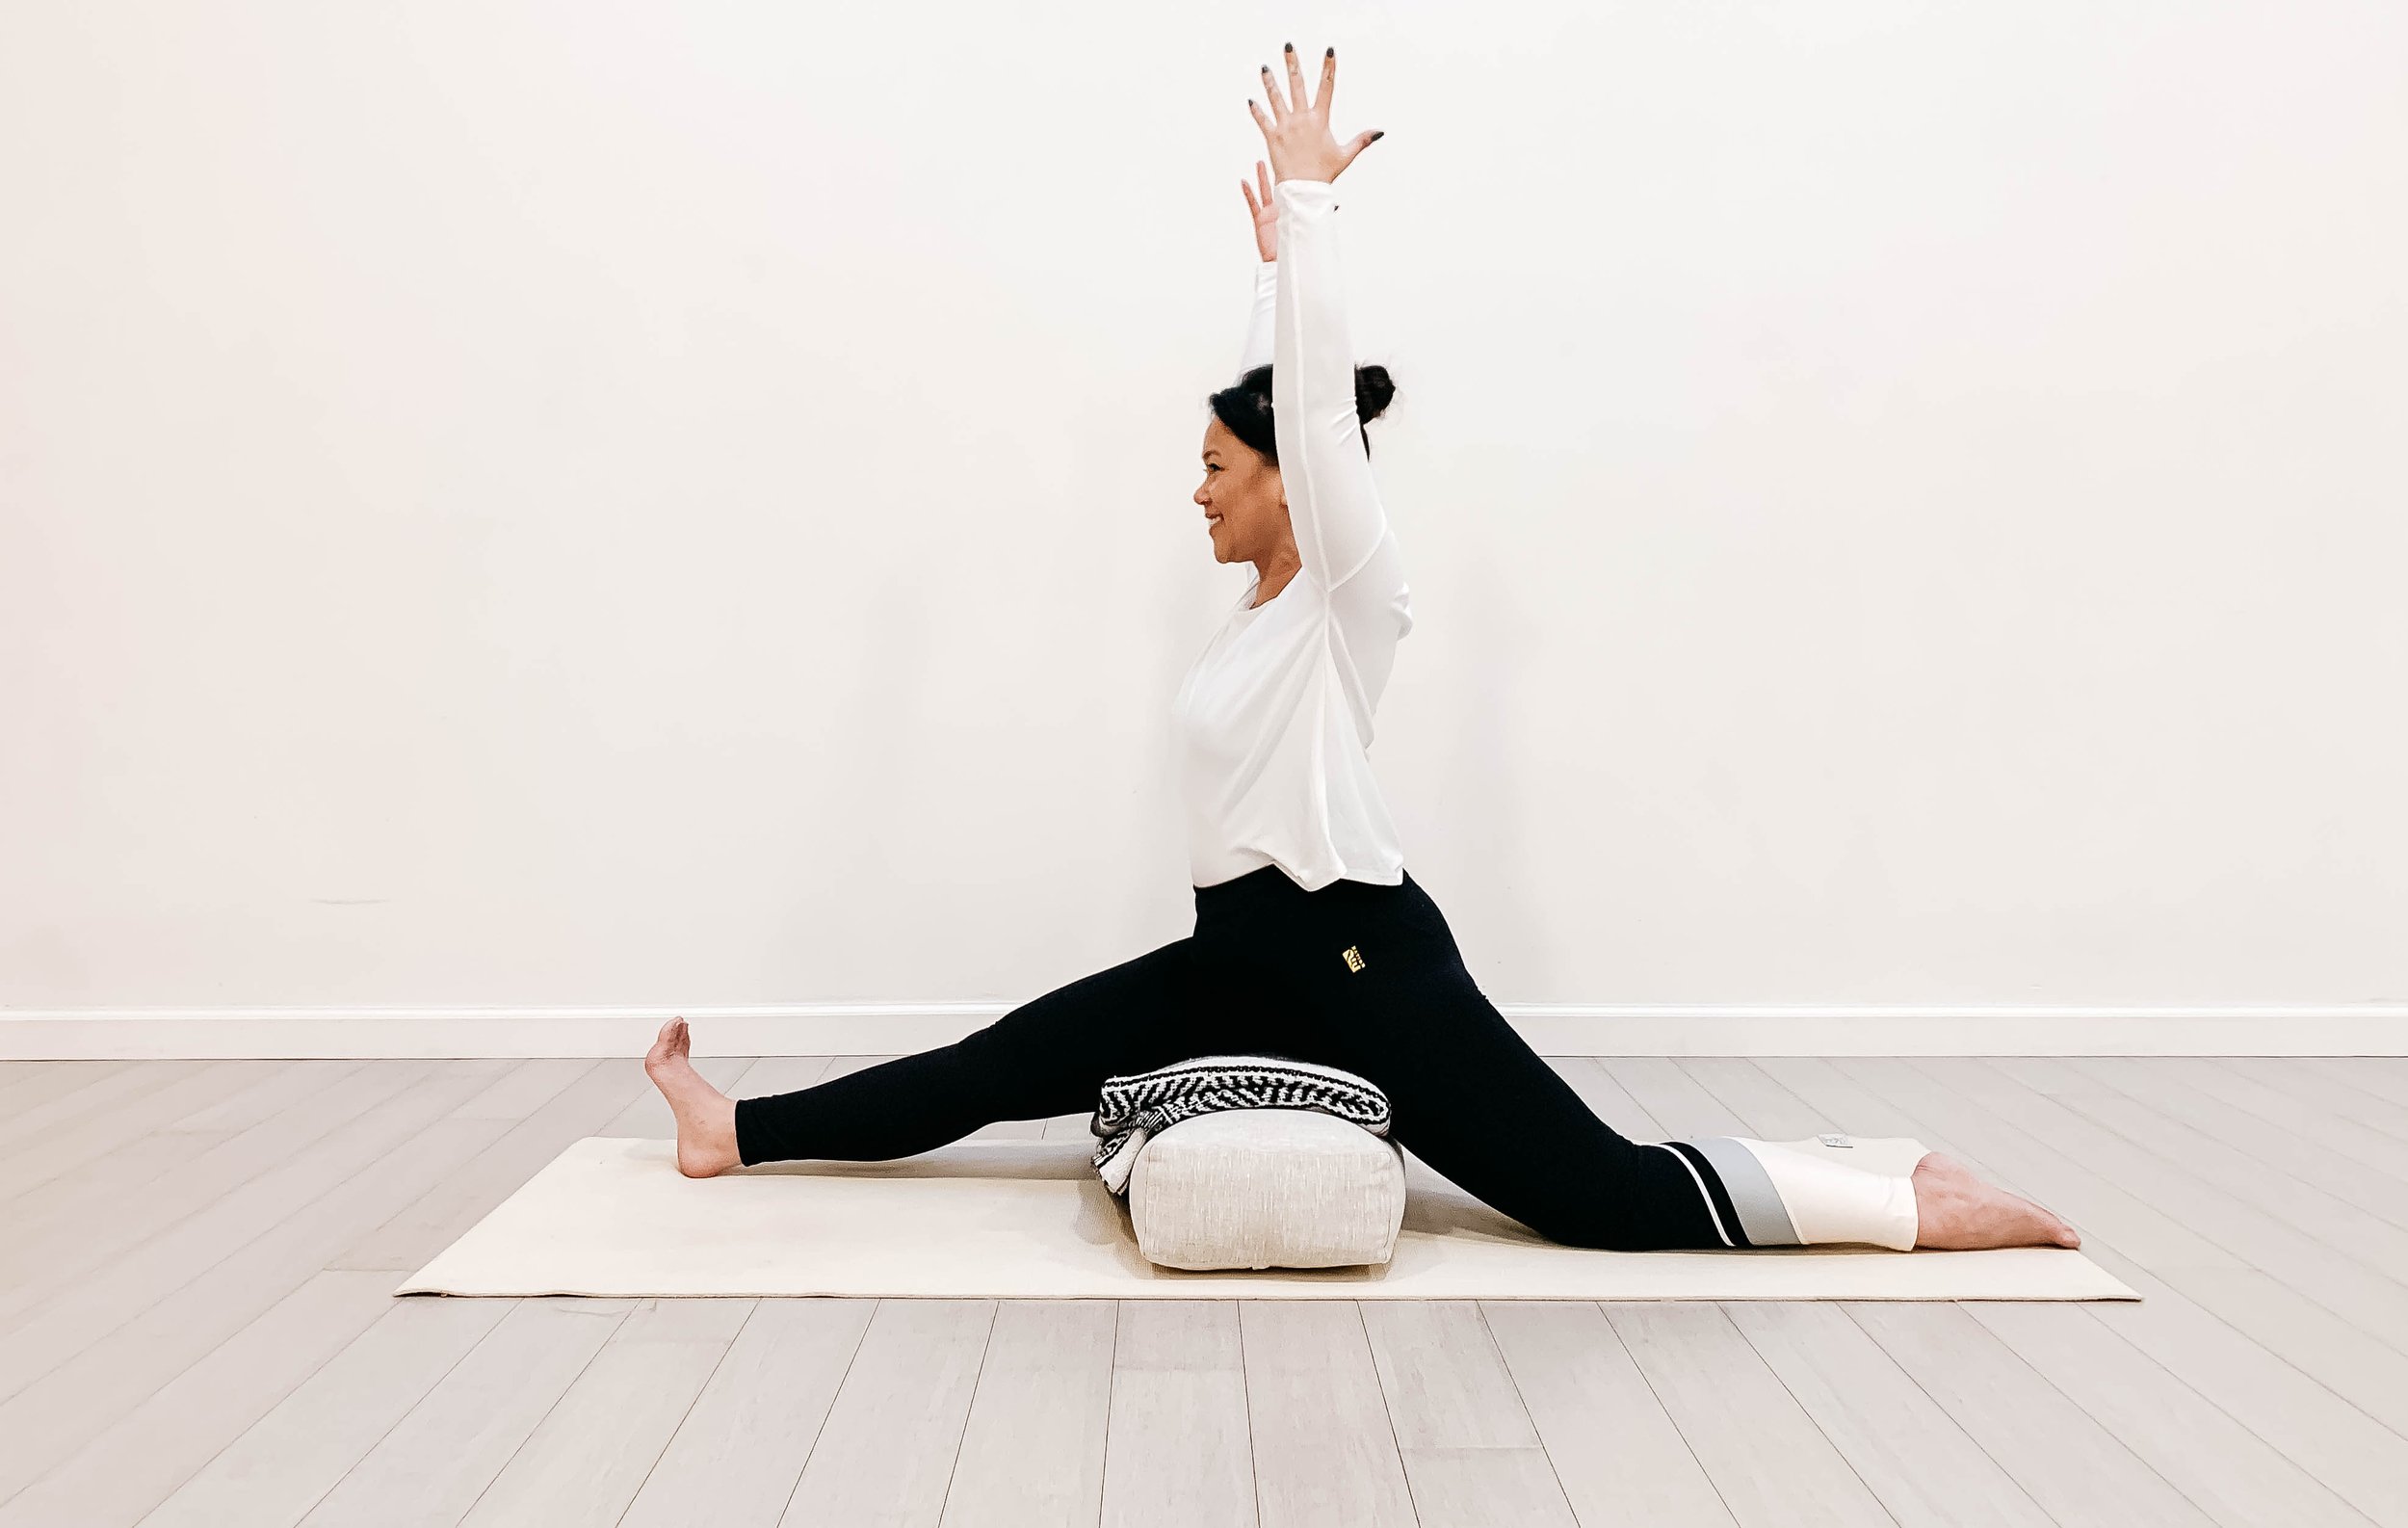
10. You’ll need two firm blankets and depending on your flexibility, a support of some kind, such as a block or bolster. Kneel down on one of the blankets with the other in front of you, whatever support you’re using positioned between the two blankets. Step your right heel forward onto the second blanket (you may have to brace your hands on the floor or on blocks), and VERY SLOWLY begin to slide the left knee back and the right heel forward. Take as much support as you may need, position it right under the topmost right thigh, just where the block was in (4). Do here just what you did at the wall in (4). Press the femur actively against the block and pull up strongly on the pubis toward the navel as you did in (7). Stay for 30 seconds to a minute.
11. You can press your palms together and rest your thumbs on the sternum in anjali mudra, or you can stretch your arms straight up. When you’re eady to exit, again bring your hands to the floor/blocks, and VERY CAREFULLY slide the left knee forward and the right heel back. Reverse the legs for the same length of time.
*The proper spellling of the name is Hanumat. The final “t” transforms into an “n” (by the rules of Sanskrit junction) when combined with “asana.” Since most everyone is used to the final-n spelling, we’ll leave it at that to avoid confusion.
TIP
When you bring the front heel forward, rest the outer edge on the floor with a strong outward rotation of the thigh. This will help release the outer hip of the front leg downward, providing more length along the right side of the torso. When straightening the knee, maintain the release of the outer hip and turn the leg back to neutral by rotating the femur head in the hip socket. Be sure the center (not the inner edge) of the back knee is touching the floor.
If you want to read an account of Hanuman’s great leap, go here, Book 5, chapter 1:
https://www.wisdomlib.org/hinduism/book/the-ramayana-of-valmiki/d/doc424560.html